

IoT or Internet of Things is one of the fastest emerging technologies in modern society. Whether it is someone’s room or home, schools, offices, shopping malls, theaters, railway stations, IoT can be seen everywhere. By connecting devices or objects or “things” via the internet and operating them remotely, IoT provides us a better way of life.
In this tutorial, we are going to discuss a very popular application of IoT which is – Smart Dustbin using IoT. This project has a wide application in railway stations, shopping malls, public parks, airports, and many more places. In this project, we will make a dustbin that will send a message to the authority when it is full. Authority can also check the filled-volume of the dustbin using a mobile app. Sounds interesting?
Components Required
Hardware
For this project, we will need a dustbin with a lid. Next, we are going to use the Arduino UNO. But you can use other boards like Nano, Mega, Mini, etc. Then, we will need an ESP8266 wi-fi module for wireless communication. We will be using ESP8266-01 but there are other versions available which you can use. We are going to use an HC-SR04 Ultrasonic Distance Sensor Module to measure the distance between the lid of the dustbin and the top surface of the garbage. And last but not the least, we will need a smartphone to display data. Apart from all this, we will need some jumper wires to make connections.
Software
Like software, we will use the Arduino IDE with ESP8266WiFi.h library installed. Read our previous article on how to transfer text using ESP8266<link> to check how to install this library. Then we will also use an android app – Blynk, to display the data. We shall also need the Blynk library for Arduino IDE. To download that follow these steps.
- Go to this link: https://github.com/blynkkk/blynk-library
- Download the zip file
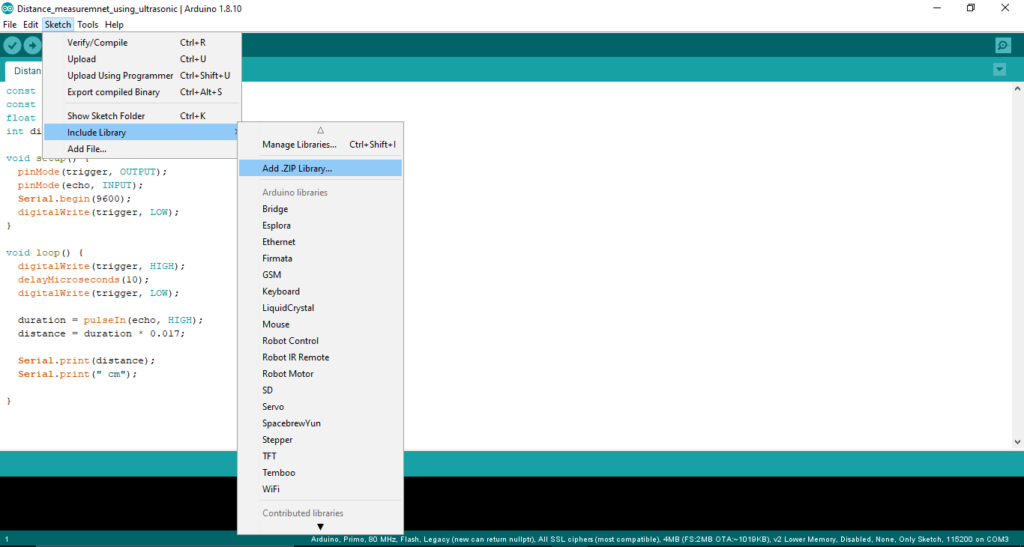
Now open the .zip file from its location. And your library will be installed.
Quick steps to follow
We are going to divide this project in four main modules –
- Measuring the dustbin using an Ultrasonic sensor.
- Setting up ESP8266 for a client-server communication
- Setting up the Blynk app
- Taking data from HC-SR04 Ultrasonic Sensor and transmitting it to the mobile using the Blynk app.
Measuring the Dustbin using Ultrasonic Sensor
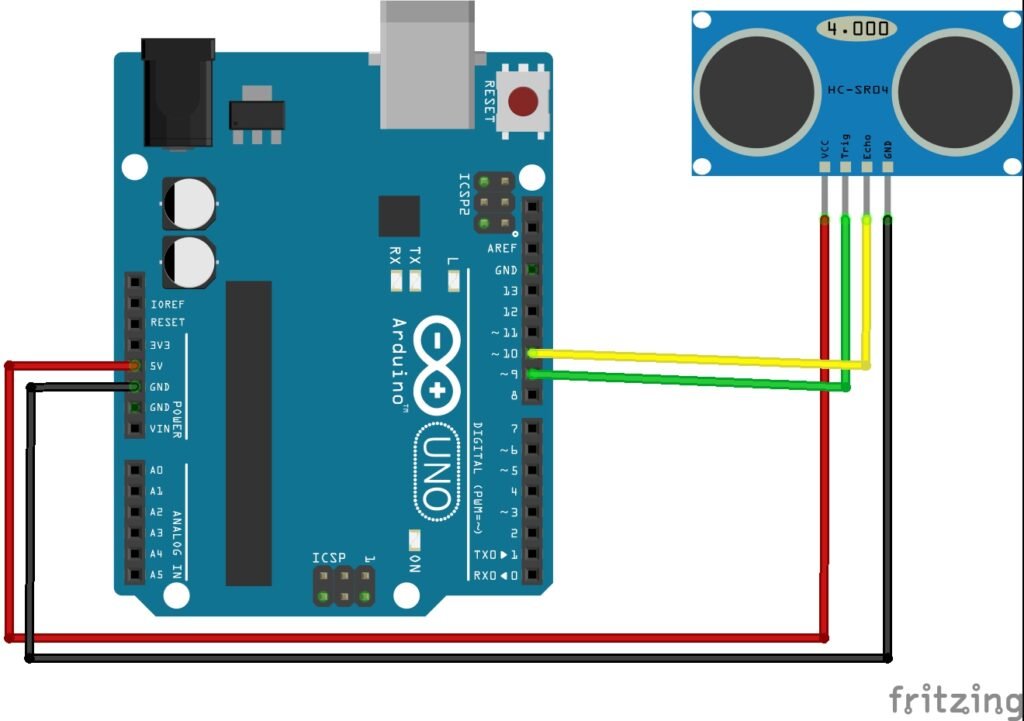
- First make the following connections (Trigg>D9, Echo>D10, VCC>5V, GND>GND) and attach the ultrasonic sensor at the lid facing the inside of the dustbin.
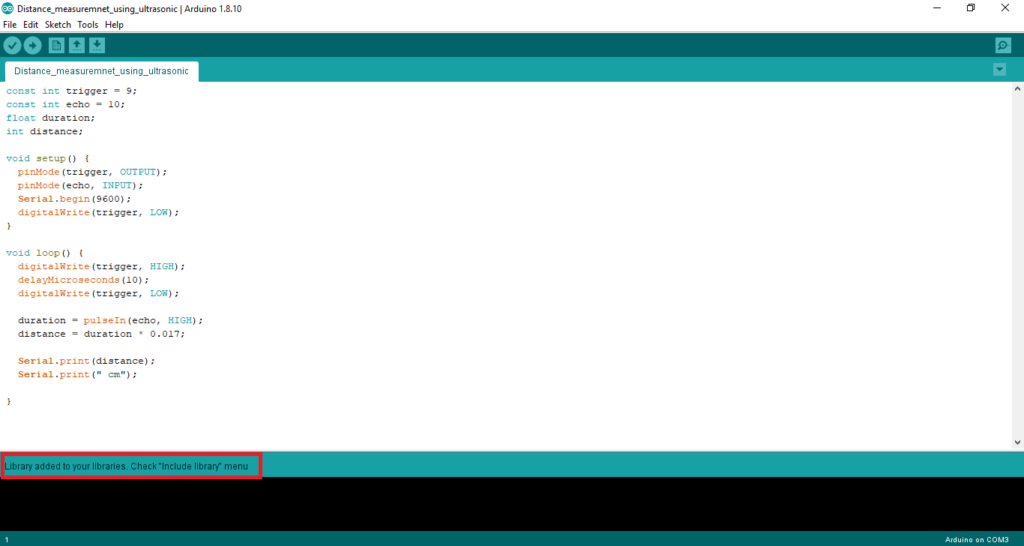
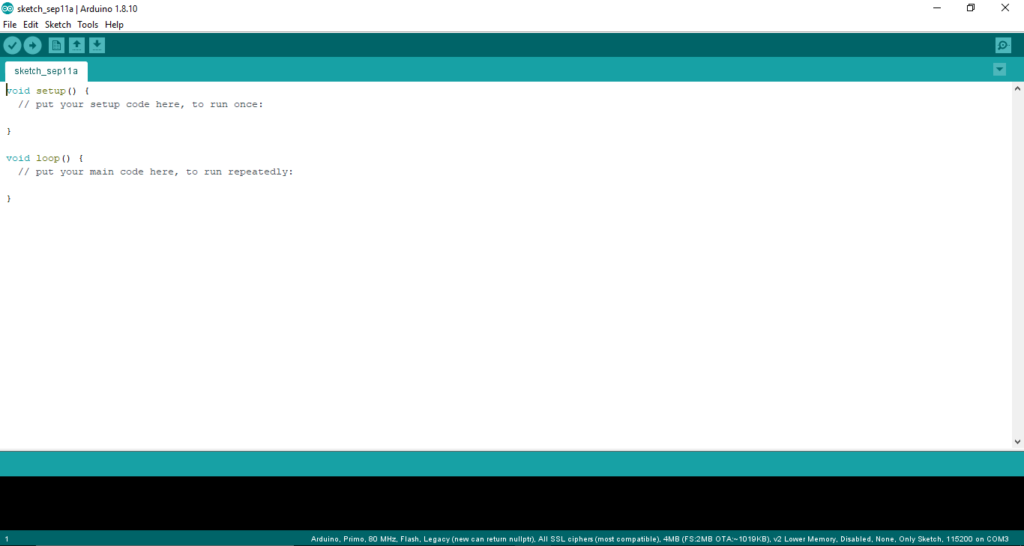
Then upload the following sketch to the Arduino.
Code
const int trigger = 9;
const int echo = 10;
float duration;
int distance;

void setup() {
  pinMode(trigger, OUTPUT);
  pinMode(echo, INPUT);
  Serial.begin(9600);
  digitalWrite(trigger, LOW);
}

void loop() {
  digitalWrite(trigger, HIGH);
  delayMicroseconds(10);
  digitalWrite(trigger, LOW);

  duration = pulseIn(echo, HIGH);
  distance = duration * 0.017; //Gives the distance in cm

  Serial.print(distance);
  Serial.print(" cm");
}
Now, close the lid and note the distance for an empty dustbin. Then, fill the dustbin completely and again note the distance. You will find the distance in the serial monitor. Note those readings for future reference. For now, I am assuming, for empty dustbin it is 80cm and for the filled dustbin, it is 5 cm.
Setting Up ESP8266
Here we need to set the ESP as a station point or a client. To do that follow these instructions:
- First make the following connections:
- TX pin of ESP → TX pin of Arduino
- RX pin of ESP → RX pin of Arduino
- Vcc pin of ESP → 3.3V pin of Arduino
- Enable pin of ESP → 3.3V pin of Arduino
- GND pin of ESP → GND pin of Arduino
- Reset pin of Arduino → GND pin of Arduino
Now disconnect the TX RX pins and reset pin. Then open Arduino IDE and upload a blank sketch like below to the Arduino. Now, make the connections like before (step–I).
- Open the serial monitor and use the following AT commands to setup the ESP8266 as a station.
- AT: If it displays OK after this command that means the module is connected properly and it is ready to be set up.
- AT+RST: This command resets the ESP. This is a necessary command.
- AT+GMR: This command shows the version of the ESP.
- AT+CIFSR: This command is used to check the IP address. AT+GMR and AT+CIFSR are not mandatory steps but it’s always good to know.
- AT+CWMODE=1: This command will set up the ESP as a client or station.
Congratulations! You have successfully set up your ESP8266 as a station point.
Setting Up Blynk
Install the Blynk app from Playstore or Appstore, then follow these steps:
- Create an account and Login.
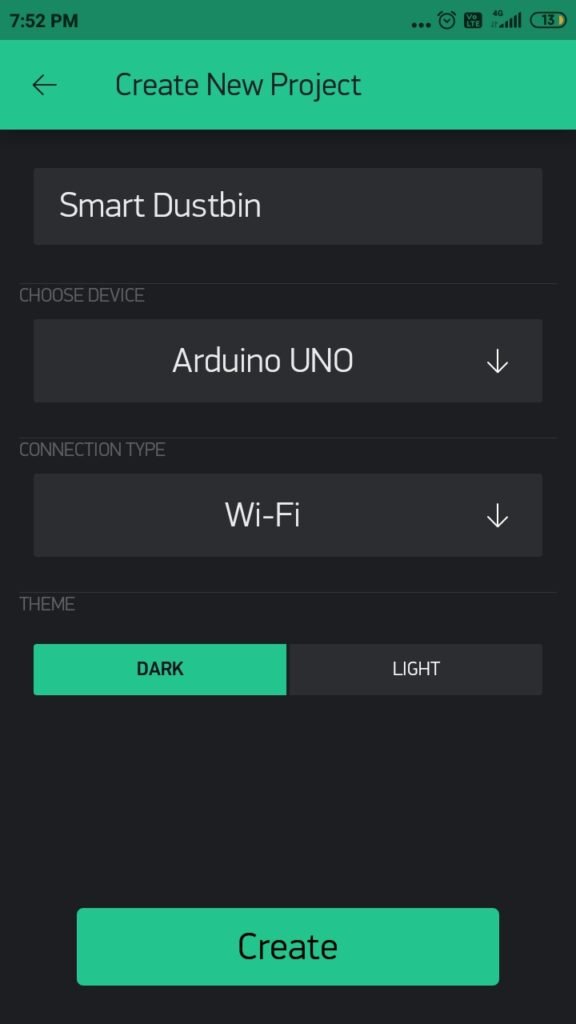
- Create new project

- Name that project “Smart Dustbin” and fill this information. You shall also get a token in your email. Keep that authentication token.
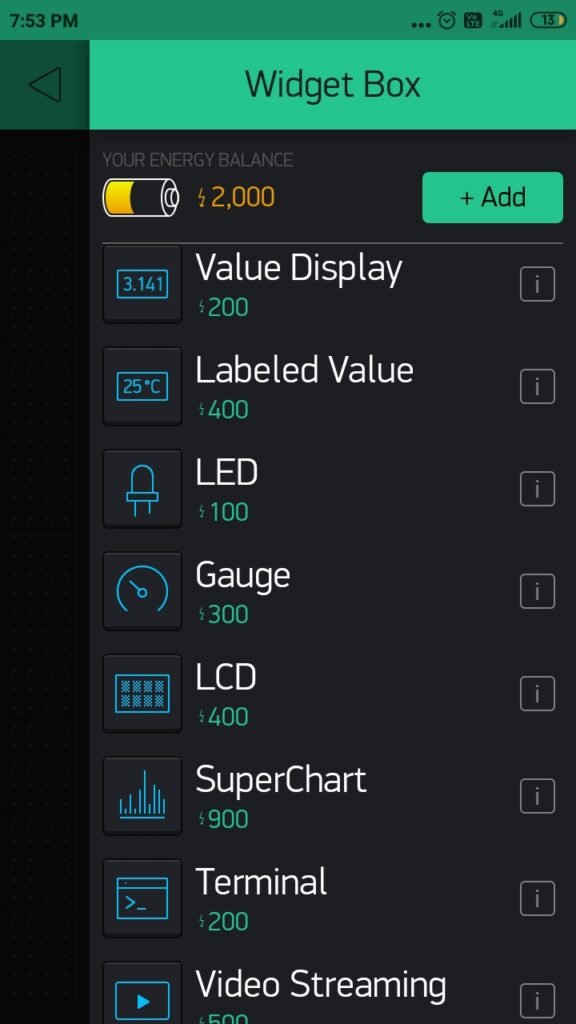
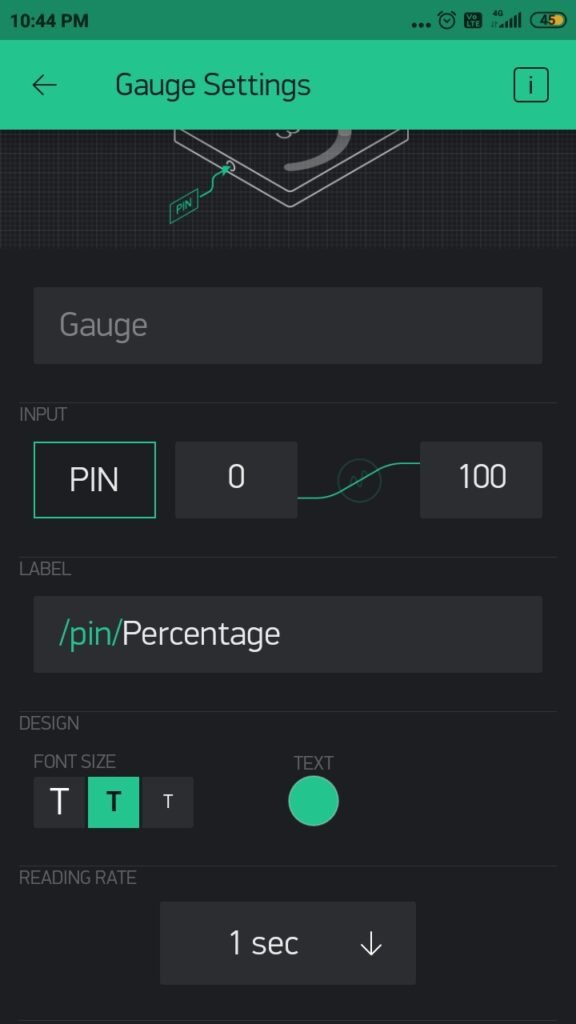
- Now select Gauge widget.
Click on the widget and apply these parameters. In case of PIN add virtual pin V5.
Getting all Together
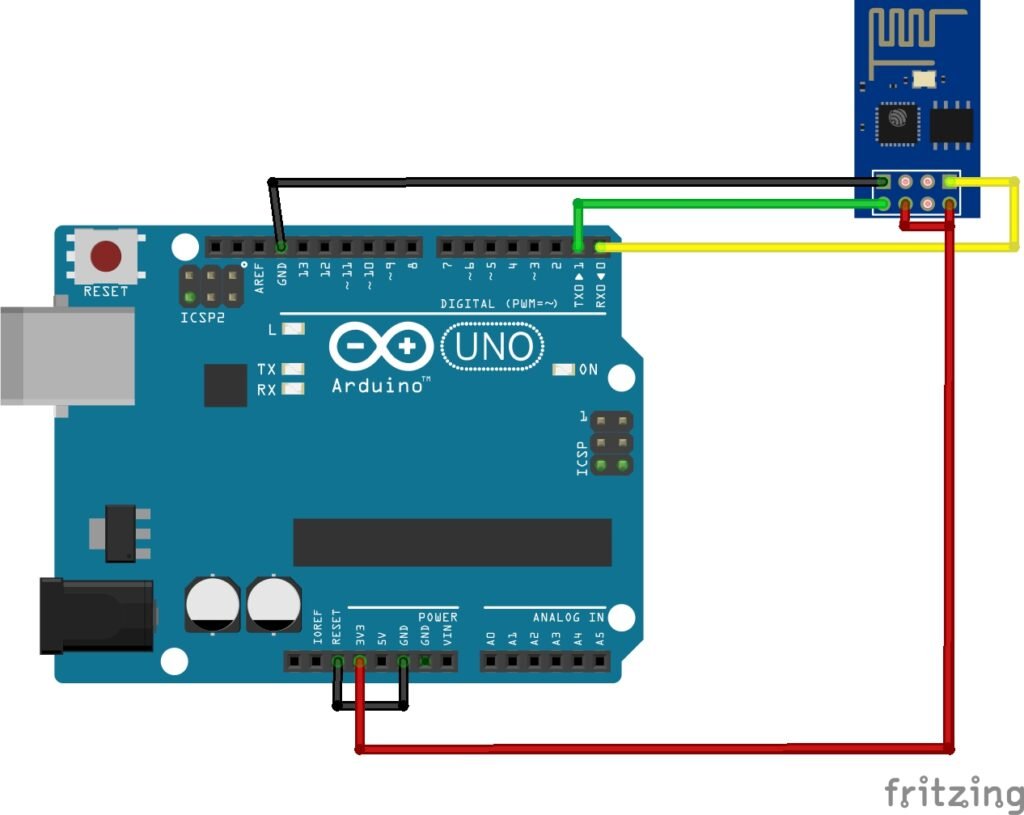
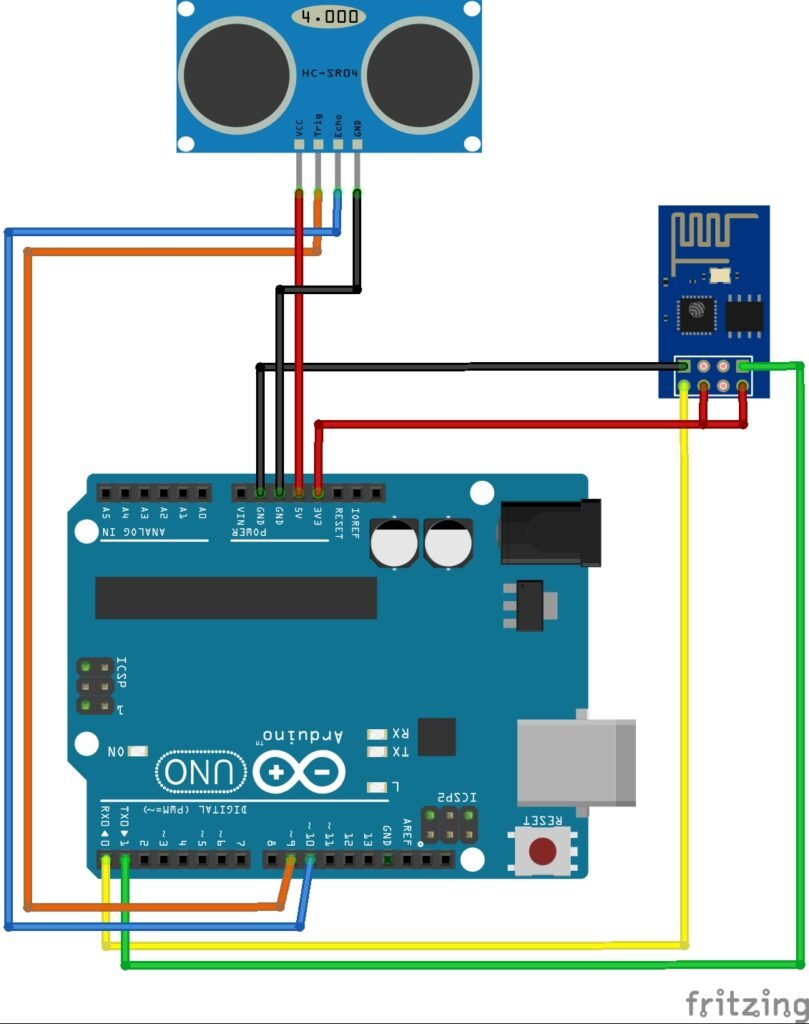
Now make the following connections:
- VCC and EN pin of ESP → 3.3V pin of Arduino
- GND pin of ESP → GND pin of Arduino
- TX pin of ESP → RX pin of Arduino
- RX pin of ESP → TX pin of Arduino
- VCC pin of Ultrasonic Sensor → 5V pin of Arduino
- GND pin of Ultrasonic Sensor → GND pin of Arduino
- Trigger pin of Ultrasonic Sensor → D9 pin of Arduino
- Echo pin of Ultrasonic Sensor → D10 pin of Arduino
Code
Now Upload this code:
#define BLYNK_PRINT Serial
#include <ESP8266WiFi.h>
#include <BlynkSimpleEsp8266.h>

const int trigger = 9;
const int echo = 10;
float duration;
int distance, percentage;

const int upper_limit = 5;
const int bottom_limit = 80;

// You should get Auth Token in the Blynk App.
// Go to the Project Settings (nut icon).
char auth[] = "YourAuthToken";

// Your WiFi credentials.
// Set password to "" for open networks.
char ssid[] = "Your SSID ";
char pass[] = "Your PASSWORD";

void setup()
{
  Serial.begin(9600);
  pinMode(trigger, OUTPUT);
  pinMode(echo, INPUT);
  digitalWrite(trigger, LOW);
  Blynk.begin(auth, ssid, pass);
}
void sensor()
{
  digitalWrite(trigger, HIGH);
  delayMicroseconds(10);
  digitalWrite(trigger, LOW);

  duration = pulseIn(echo, HIGH);
  distance = duration * 0.017;

  percentage= ((bottom_limit - distance)/(bottom_limit - upper_limit))*100;
  //Actually percentage = (((bottom_limit - upper_limit)- (distance - upper_limit))/(bottom_limit - upper_limit)))*100;

}
BLYNK_READ(V5){
    Blynk.virtualWrite(V5, percentage);
}
void loop()
{
  sensor();
  Blynk.run();
  BLYNK_READ(V5);
}
Now you have successfully made your smart dustbin. If you have any queries, feel free to comment that below. Thank you for reading.
hye…
i hv tried this code..but appears
exit status 1
ESP8266Wifi.h: No such file or directory