
In this tutorial, you will clearly learn about Arduino Uno. Arduino Uno is an open-source microcontroller board developed by Arduino.cc. There are many different development boards available but Arduino is a most preferable development board among enthusiasts as it is inexpensive than other development boards. Arduino Uno is totally based on the AVR Atmega328 microcontroller. Among many prototyping platforms, Arduino is the most used board though it was not the first one to come into the market.
What we can do with Arduino Uno?
It has an amazing feature of interacting with anything controlled by electricity in different ways. It takes the electrical inputs and gives out the electrical outputs. For example, it takes the input from sensors, motors, or electromagnets and can display the output as per our requirement. This acts as the brain for many different projects.
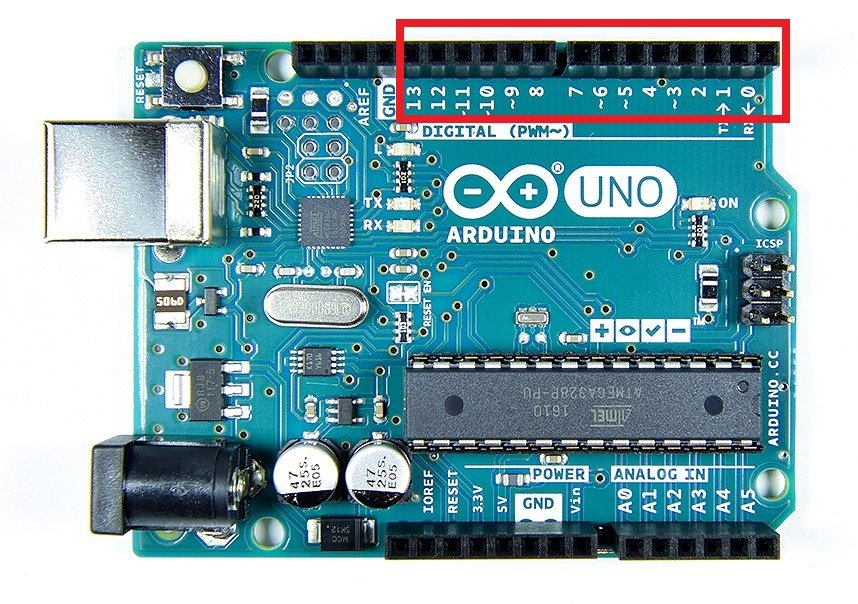
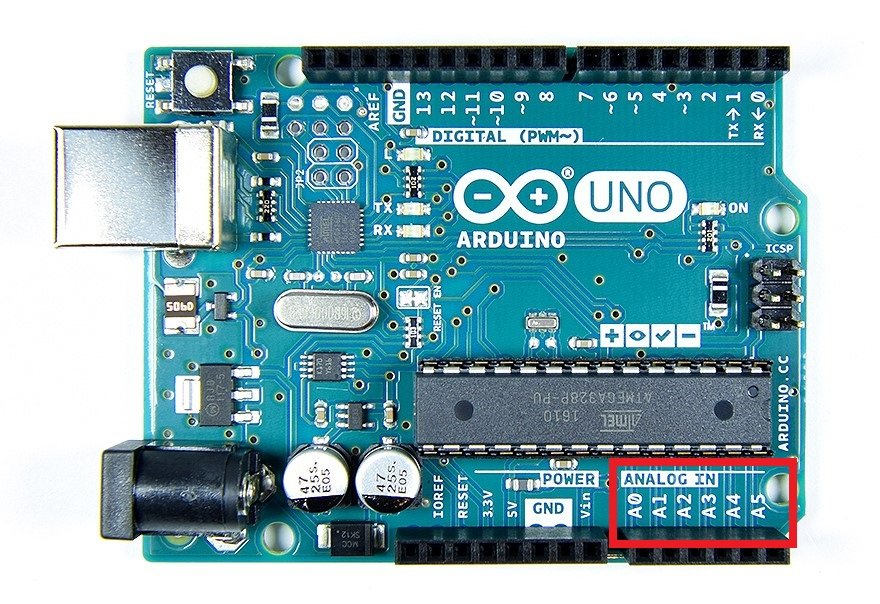
Pin Outs Diagram of Arduino Uno
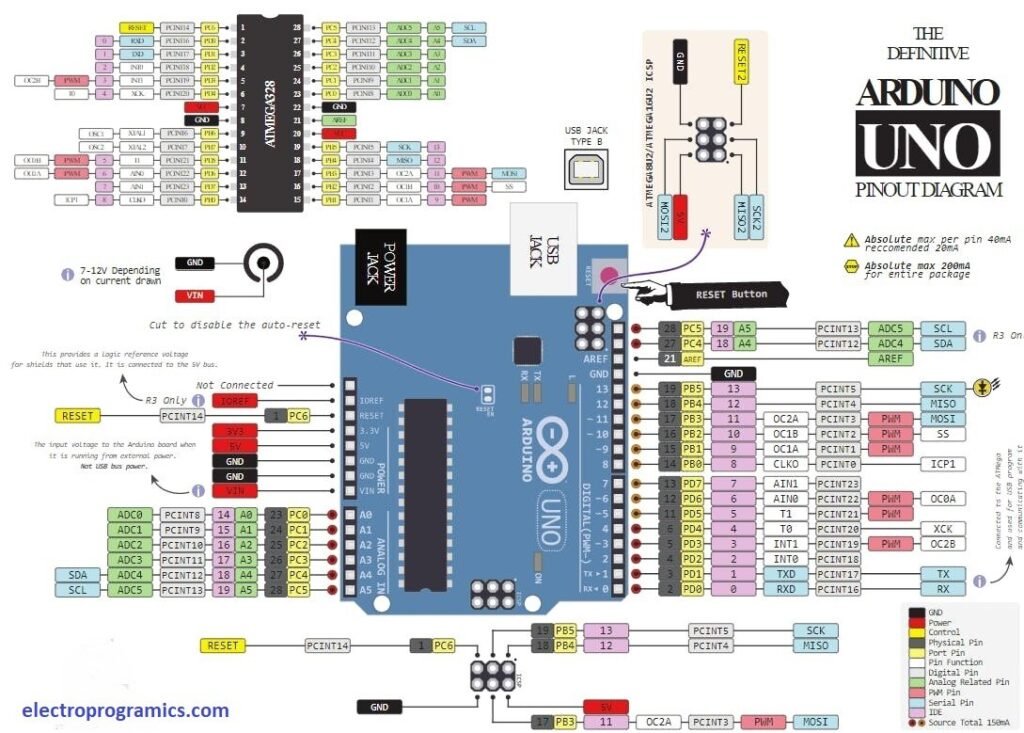
Pin Configuration Explanation
Now coming to the pin configuration of the Arduino Uno Board, each pin has more than one function like PWM, GPIO, Analog but we cannot use multiple features of the pin at a time and can work only with one function of the pin at a time. Now, let’s discuss the functions of each pin:
- GPIO PINS
Arduino Uno consists of 14 digital I/O pins. These pins can be used as digital input or digital output pins. These pins can act as high or low i.e, 0 0r 1 and in-between values will not be considered. The function of the digital pins is to sense the digital voltage presence. For example, if we connect a push button to the Arduino Uno and if the push button is high then it senses 5V and if the button is low it senses 0V.
There are three main functions for programming the GPIO pins:
- pinMode
- digitalWrite
- digitalRead
pinMode: This function is to initialize any pin as an input/output.
Example: pinMode(12,OUTPUT) Here, using pinMode initializes 12 as the digital output.
digitalWrite: This function is used for giving High or Low value to the particular pin. It means 0V or 5V to the digital pin.
Example: digitalWrite(13, HIGH); Here, the 13th pin on the Arduino Uno is supplied with 5V.
digitalRead: This function reads the given digital input pin and stores the value.
Example: digitalRead(8); Here the function will be reading digital value of the pin number 8 from this function,
- Analog Channel Pins
The total number of Analog pins are 6. All the analog pins are present opposite to the digital pins on the board. The resolution of the analog pins is 10 bit. The numbering of the Analog pins starts from A0 and ends with A5. The main function of these pins is that they can connect with any other analog devices that take analog inputs. The range of analog voltage is between 0V and 5V. We have an opportunity of using the AREF pin or analogReference() to configure it to the lower range. The analogReference() function is available in the Arduino IDE. The maximum voltage that can be read directly through these analog pins is 5V. The Arduino Uno has an inbuilt ADC (Analog to Digital Converter) for converting the analog signals to a digital number ranging from 0-1023. The function that we use to initialize analog channel is:
int analogoutput = analogRead(int pin_number);
- Pulse Width Modulation Pins (PWM)
There are 6 PWM pins present on the Arduino Uno board. The pin numbers are 3,5,6,9,10, and 11 respectively and have an 8-bit resolution. On the board, the numbers with (~) symbol are PWM pins. The PWM output with a specified duty cycle is provided by analogWrite(pin number,duty_cycle). The variations of the duty cycle vary between 0-100% or 0-225.

- Some Important Pins
- Reset Button – By clicking on this pin we can restart the code that is uploaded in the Arduino. This button is especially used when we get a problem during the running program. In that case, if we use this reset button the program starts running from the initial.
- Ground Pin – There are 3 GND pins on the Arduino and all of them work as same
- 5V Pin – This pin supply 5 V power supply to the device we connect.
- 3.3V Pin – This pin can supply a 3.3 V power supply to the devices.
- Voltage Regulator – It helps in controlling the voltage going into the Arduino board.
- USB Port – This port helps upload the sketches from your PC to the board and also in powering up the Arduino Board.
- AREF – As said above it is Analog Reference that allows us to provide the Arduino a reference voltage from any external power supply.
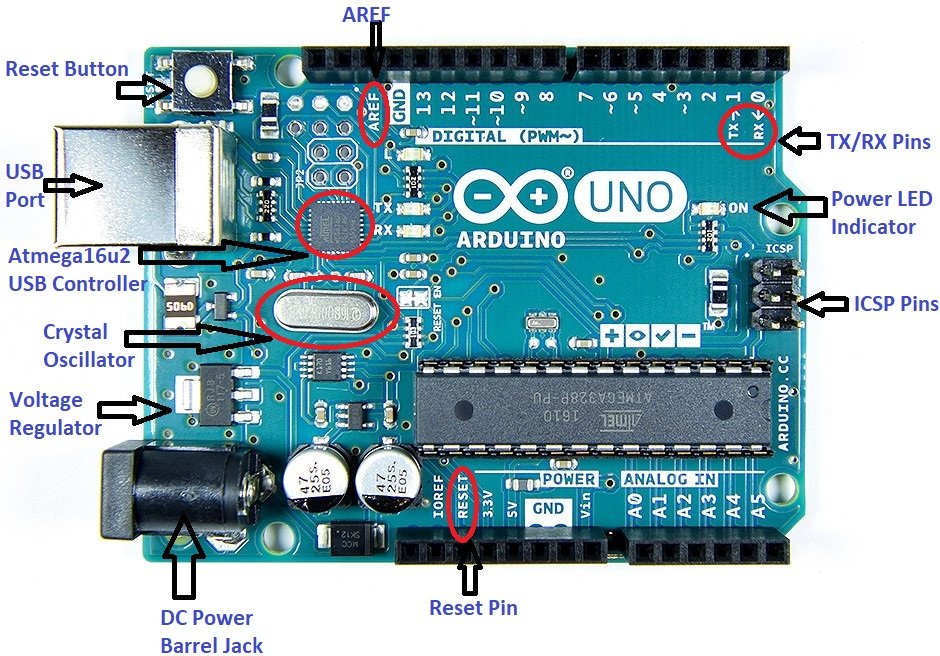
- TX/RX pins – These pins are for transmitting and receiving TTL series data.
- ATmega328 Microcontroller – This is the brain of the Arduino where all the programs are stored
- ICSP – The ICSP pins can control the serial communication between your device and the microcontroller.
- Atmega 16u2 USB Controller –
- Crystal Oscillator – The Crystal Oscillator gives a clock signal to the ATmega 328 microcontroller. In general, it provides a square wave signal that determines the time required for n state. For Example, the Arduino Uno has 16Mhz frequency so it takes 1/16 seconds to run 1 n state.
- DC Power Barrel Jack: The power Jack helps power the Arduino with any power supply ranging from 7V-12V DC.
- Reset Pin – For Restarting the program.
- Power LED Indicator – Once the Arduino Board is connected to the power source this LED lights up indicating the user that there is an external power source for the Arduino Uno.
Specifications of Arduino Uno
- Maximum operating Voltage – 5V
- Crystal Oscillator – 16Mhz
- In-Built LED- Pin 13
- Flash Memory – 32KB
- EEPROM – 1KB
- SRAM – 2KB
- The board also supports an external micro SD card.
- The user can use the micro SD card if they want to store more information if the code goes much complex.
- It has an onboard LED and an easy USB interface.
- DC Current for the I/O pins – 20mA
- DC Current for the 3.3 V pin – 50mA
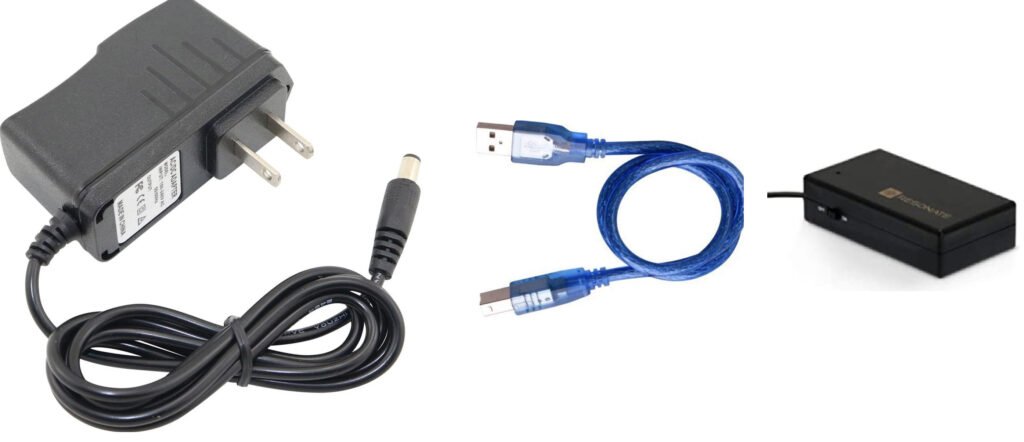
Power Supply of Arduino Uno
To run the program in the Arduino Uno power source is required in different ways. The most common way is connecting the board directly to your PC via a USB cable. But if you want the project to be your mobile then better to use a 9V battery pack. The final one is through a 9V AC power supply.
Arduino Uno Programming
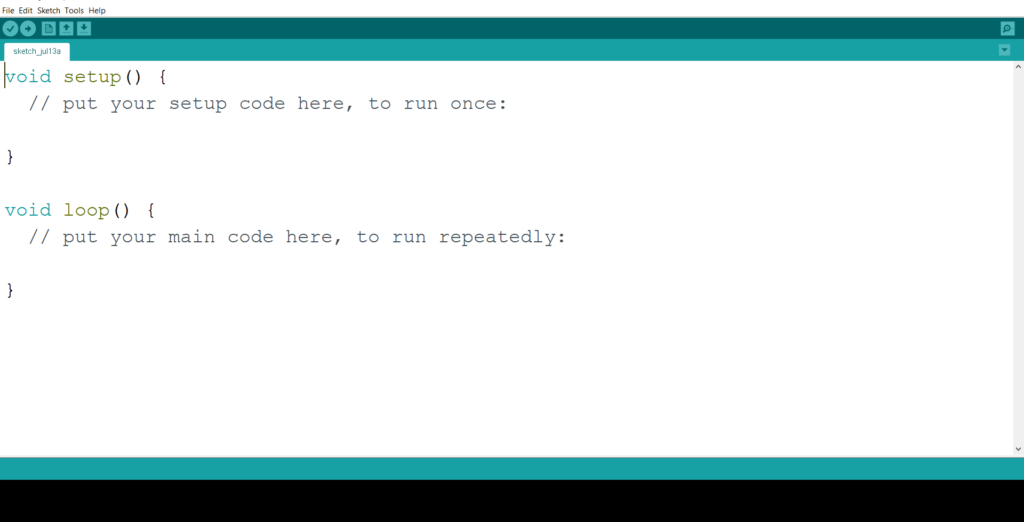
In programming the Arduino Uno we need to use Arduino IDE for making sketches. The Arduino IDE looks as shown below:
- The sketches that are developed in the Arduino IDE can be directly uploaded with the help of the USB port that makes the user work easier.
- The programming languages are C and C++
- IDE can work in Linux, Windows Operating System, and MAC.
- The sketch is a set of commands or instructions given to the board to perform the functions accordingly.
- And the software that is useful in creating sketches is called Integrated Development Environment (IDE).
- In the Arduino IDE, the two parts are mandatory for running the program. One of them is a void loop and void setup function.
Shield Compatibility
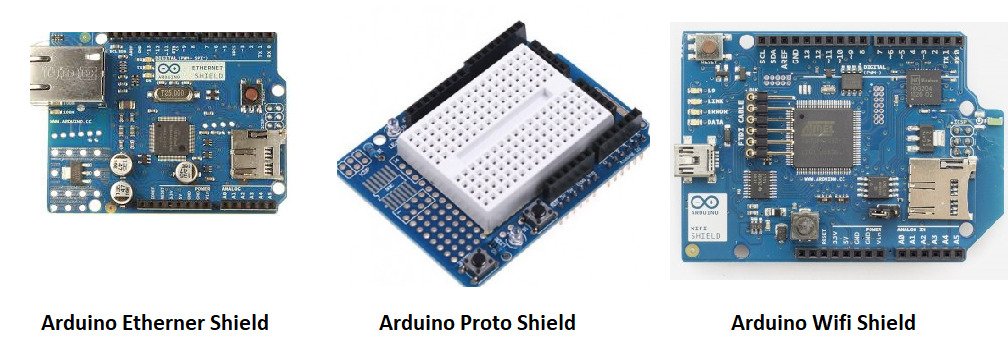
The shields take all the complexity of the hardware and reduce it to a simple interface. Not only the hardware but they take care of software as they have programming libraries associated with them. These shields are to be just plugged on the top of your Arduino Board. There are different types of shields available to perform different tasks and I can simply tell they are countless. The one thing the user you look before buying the shield is to check the operating voltage of the shield shouldn’t exceed the operating voltage of your Arduino Board. If that exceeds your board may destroy. There are some shields that are used by many enthusiasts. They are:
- Ethernet Shield
- Proto Shield
- Wireless Shield
Applications:
There are many applications that we can do with Arduino Uno. Especially this board was very much famous and has countless applications due to its low cost and user friendly nature. Some of them are:
- Robotics
- Embedded Systems
- Innovative Projects
- Medical
- Data loggers and many more.
Finally, I hope everyone is clear about the topic of Arduino Uno. So if you have any queries on the topic, please feel free to comment below. Will be back with another interesting topic soon.